 Pin to Board
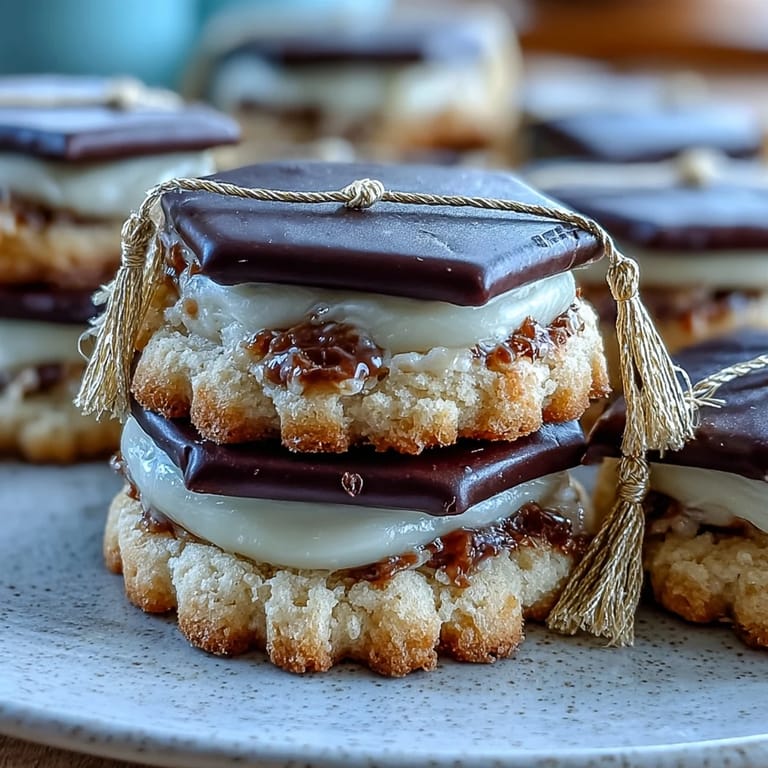
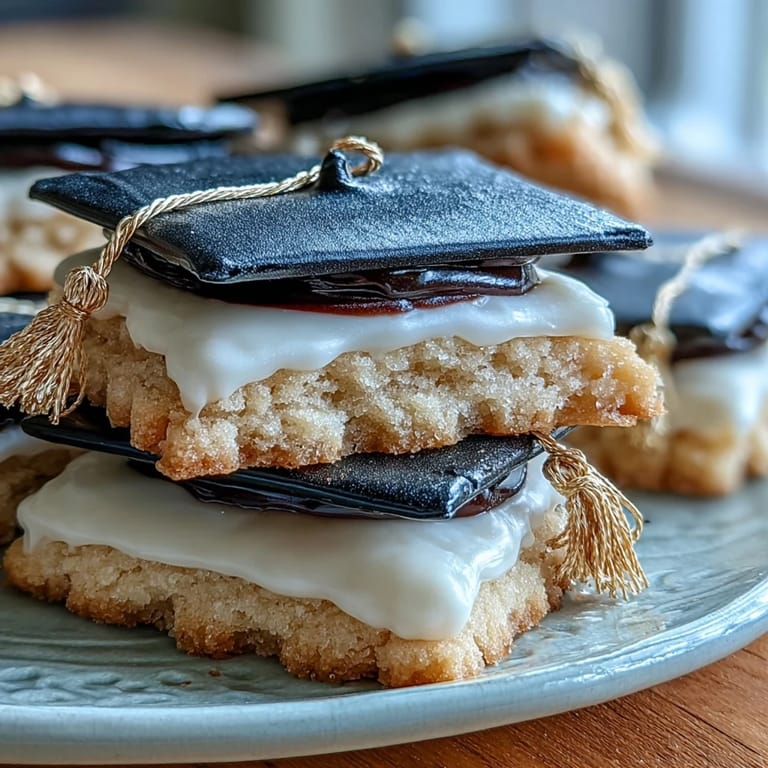
 When the air first started to buzz with excitement at my younger sister’s graduation, I found myself rummaging through my baking drawer in search of those elusive diploma-shaped cookie cutters I’d “just put somewhere safe.” Sugar cookies have always been an easy crowd-pleaser, but as I rolled out the dough on a bright Saturday afternoon, the golden sun and energetic playlist turned what could have been a tedious decoration session into something genuinely joyful. It’s the smell of vanilla-butter warmth that always seems to signal celebration in my kitchen, and these playful, gold-dusted treats reflect that feeling perfectly. Nothing says 'Well done!' quite like a platter of sparkly cookies, especially when each cap and scroll is painted with a little extra care. Watching the icing set, I couldn’t help but marvel at how quickly even grown-ups reach for the shiniest one.
The very first batch of these cookies emerged from the oven while my kitchen was surrounded by half-written cards, and a Bluetooth speaker blaring ‘Pomp and Circumstance’ on repeat. I still hear my friend Sam’s delighted laugh as she tried to guess which piping bag held the edible gold, feeling like a proper baking magician for a few moments.
Ingredients
- All-purpose flour: The base for sturdy yet tender cookies—measuring carefully keeps the dough from getting tough.
- Unsalted butter: Must be room temperature for that signature melt-in-your-mouth texture; impatient? Cut into cubes to speed up softening.
- Granulated sugar: Lends just enough sweetness and helps with golden edges.
- Large egg: Binds dough so cut-outs hold their shape, especially for detailed cookie cutters.
- Pure vanilla extract: Warm vanilla fills the house, signaling something special is underway.
- Almond extract: A hint of this (optional) brings out a bakery-fresh aroma, though lemon extract can brighten the flavor for a twist.
- Salt: Just the right amount wakes up all the other flavors.
- Powdered sugar: Key for silky royal icing that dries to a flawless finish; always sift to avoid clumps.
- Egg whites (or meringue powder + water): Provides structure and shine to the icing—no shortcut here.
- Cream of tartar: Stabilizes the icing so it pipes sharp lines and smooth surfaces.
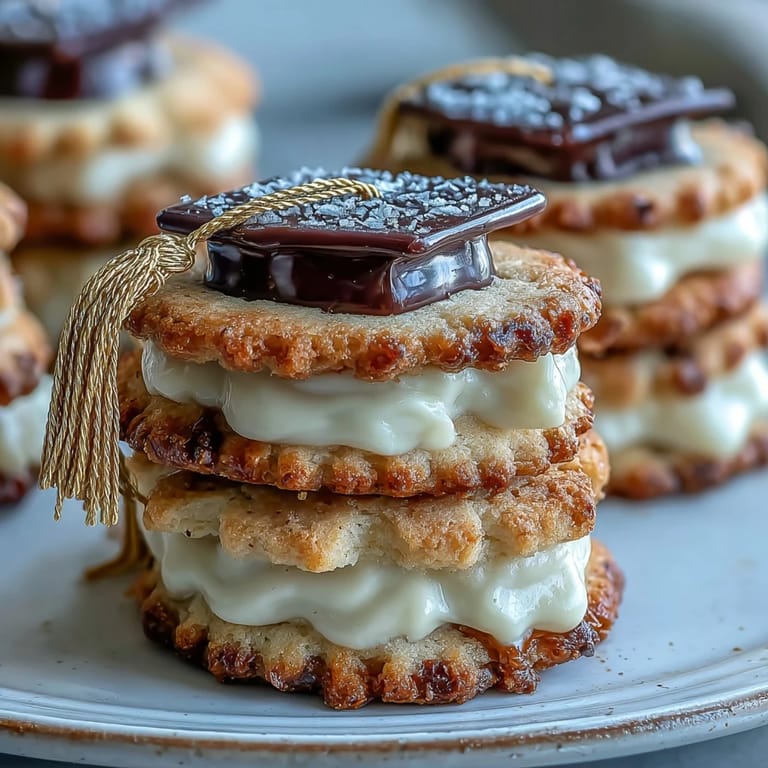
- Black gel food coloring: Creates dramatic graduation caps with just a drop or two.
- Gold edible luster dust + clear alcohol or lemon extract: The secret to those glowing, celebratory details; use a delicate brush for steady hands.
Tired of Takeout? 🥡
Get 10 meals you can make faster than delivery arrives. Seriously.
One email. No spam. Unsubscribe anytime.
Instructions
- Cream It Up:
- Beat butter and sugar until everything turns fluffy and pale, letting the hum of the mixer mark the start of something festive.
- Add Flavors & Egg:
- Pour in vanilla, almond (if using), and crack the egg, mixing just until the dough seems eager to come together.
- Shape & Chill:
- Divide into discs, wrap tightly, and tuck into the fridge—the chill will make rolling and cutting those intricate shapes a breeze later.
- Prep & Roll:
- As your oven preheats, dust the counter like fresh snow and roll dough to that ideal 1/4-inch; cookie cutters press through with a satisfying thud.
- Bake the Shapes:
- Arrange on lined trays and bake until the edges look just golden, the irresistible aroma making patience a challenge.
- Cool Completely:
- Let cookies rest on wire racks—they’ll firm up and be ready for their icing 'diplomas.'
- Mix Royal Icing:
- Beat egg whites until foamy, then rain in powdered sugar and cream of tartar; when it stands in shiny peaks, it's perfect.
- Tint & Divide:
- Stir in vanilla, then split the icing and add color: black for caps, keep some white, and save a portion for gold details.
- Pipe & Flood:
- Get creative piping outlines, flooding with glossy icing, and adding details; it’s strangely satisfying to watch patterns emerge.
- Paint with Gold:
- Mix luster dust and clear alcohol until it's barely runny, then lightly paint ribbons and tassels—it feels almost ceremonial each time.
 Pin to Board
  Pin to Board
 One evening, just after final exams, my little nephew surprised me by carefully carrying the cookie platter to his mom, holding it out with both hands like he was presenting a real trophy. Moments like that—the crumbs on the carpet, the giggles around the table—remind me these cookies are more than a recipe; they’re part of the memory itself.
Best Occasions for These Cookies
I’ve found these make perfect gifts not only for graduations but for any celebration where encouragement matters. Whenever I box them up, I like to tuck in a note congratulating the recipient—sometimes the personal touch gets as many smiles as the gold paint.
Getting Royal Icing Just Right
Don’t stress if your icing consistency takes a few tries; a little extra powdered sugar saves a runny batch, while a drop of water smooths out something too stiff. The trick is finding that sweet spot where the icing holds its shape but melts into a glossy finish on the cookie.
Decorating Like a Pro, Even If You’re Not
The difference between amateur and show-stopping cookies is patience. Working in stages and letting each layer dry prevents colors from running together and keeps your gold accents crisp.
- Keep a damp towel over unused icing so it doesn’t dry out mid-project.
- Practice gold details on parchment before committing to a cookie.
- Embrace little imperfections—they’re the best sign of hand-made love.
 Pin to Board
  Pin to Board
 May every batch you bake bring its share of smiles and a shimmer of celebration, all the way from kitchen to ceremony. And if there’s a sprinkle of flour on your nose at the end, that’s just extra proof of a job well done.
Recipe Questions & Answers
- → How long should I chill the dough?
Chill the dough for about 45 minutes. Chilling firms the butter, which reduces spreading in the oven and makes it easier to roll and cut clean shapes.
- → Can I substitute meringue powder for egg whites in the icing?
Yes. Use 4 tablespoons meringue powder mixed with 6 tablespoons water to replace 2 large egg whites. Whip with powdered sugar and cream of tartar until stiff, glossy peaks form.
- → What consistencies of royal icing do I need?
Use a thicker icing for piping outlines and fine details, and a slightly thinner 'flood' consistency for filling shapes. Thin with a few drops of water to reach flood consistency, but add sparingly to avoid runniness.
- → How do I apply gold luster dust safely?
Mix gold luster dust with a few drops of clear alcohol (vodka) or lemon extract to make a paint. Use a fine, food-safe brush to apply accents to tassels and ribbons, then allow to dry completely.
- → Can I freeze the dough or baked cookies?
Freeze dough discs wrapped tightly for up to 3 months; thaw in the refrigerator before rolling. Baked and decorated cookies can be frozen between layers of parchment, but decoration texture may change—use airtight containers once fully set.
- → How can I prevent cracking or browning during baking?
Roll dough evenly to 1/4-inch, avoid excess flour on the surface, and bake just until edges are lightly golden (8–10 minutes). Overbaking causes browning and can make the surface prone to cracking when icing.