 Pin to Board
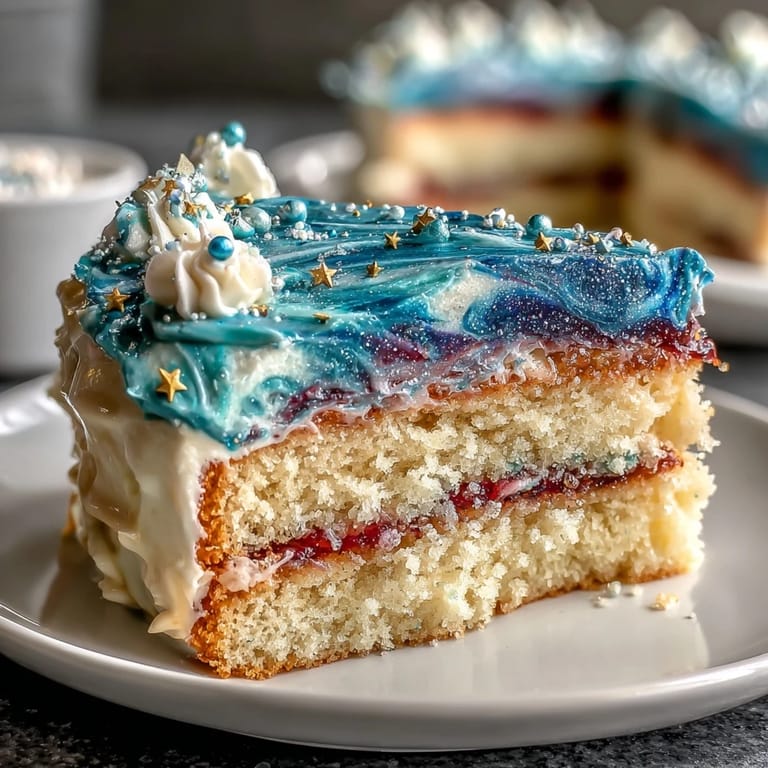
 My cousin called me in a panic two weeks before her graduation, asking if I could make something that looked as impressive as her four years of hard work felt. She wanted edible stars, celestial swirls, and something that would make her friends stop mid-conversation when they saw it emerge from the cake box. I'd never attempted a galaxy cake before, but there was something about the challenge—mixing colors like a painter, creating something that felt almost too beautiful to eat—that made me say yes immediately.
The night before the party, I was piping buttercream in my kitchen at 10 p.m., and my partner walked in to find me standing back from the cake with my hands on my hips, genuinely shocked at how the colors were swirling together. They laughed and said it looked like I'd trapped outer space on a plate. That moment—when a recipe stops being instructions and becomes something magical—is why I keep coming back to baking.
Ingredients
- All-purpose flour (2 ½ cups): Measure by spooning into your cup and leveling off, not scooping directly from the bag, which can pack the flour and make your cake dense.
- Granulated sugar (2 cups): This creams beautifully with butter to create an airy base, and the crystal size matters—regular granulated is your friend here.
- Whole milk (1 cup): Room temperature milk incorporates smoothly into the batter without shocking the temperature and creating lumps.
- Unsalted butter (1 cup plus 1 ½ cups for buttercream): Softened butter whips up light and fluffy; cold butter won't incorporate properly and will leave you with a grainy crumb.
- Large eggs (4): Room temperature eggs emulsify with the butter and sugar, creating structure; cold eggs can seize the mixture and ruin your batter.
- Baking powder (2 ½ tsp): Don't skip the mixing step with flour and salt—a whisk prevents clumps that could create dense pockets in your cake.
- Vanilla extract (1 tbsp): Pure vanilla, not imitation, makes a noticeable difference in the final flavor and warmth of the cake.
- Powdered sugar (5 cups): Always sift this before adding to buttercream, or you'll spend twenty minutes of your life breaking up stubborn lumps.
- Gel food coloring (black, navy blue, purple, pink, teal): Gel coloring produces those saturated, cosmic hues that liquid food coloring can't achieve without thinning your buttercream.
- Edible star sprinkles and glitter: These are the finishing touch that makes the cake feel celebratory and intentional, not just decorated.
Tired of Takeout? 🥡
Get 10 meals you can make faster than delivery arrives. Seriously.
One email. No spam. Unsubscribe anytime.
Instructions
- Prep your pans like you mean it:
- Preheat your oven to 350°F and grease all three pans thoroughly, then line the bottoms with parchment paper. This step prevents the frustration of a cake that sticks or bakes unevenly across the pans.
- Cream butter and sugar until clouds form:
- Beat the softened butter and sugar together until the mixture is pale, fluffy, and takes about three to four minutes. You're aerating the mixture, which gives your cake its tender crumb.
- Add eggs one at a time with confidence:
- After each egg, beat well and scrape down the bowl—this ensures even distribution and prevents a separated, broken-looking batter. Add vanilla and you've got your wet base ready.
- Whisk dry ingredients in their own bowl:
- Combine flour, baking powder, and salt and whisk them together thoroughly. This distributes the leavening evenly so your cake rises uniformly.
- Alternate wet and dry like a gentle dance:
- Add one-third of the dry mixture, then one-half of the milk, then another third of the dry, then the remaining milk, and finish with the final dry portion. Stop mixing as soon as everything combines—overworking develops gluten and toughens your cake.
- Divide batter and fill pans evenly:
- Use a kitchen scale or visual estimation to split the batter into three equal portions so all layers bake at the same rate. Smooth the tops gently with a spatula.
- Bake until a toothpick tells the truth:
- Bake for 30 to 35 minutes at 350°F, and test with a toothpick in the center—it should come out clean with no wet batter clinging to it. Overbaking is your enemy here; slightly underbaked is better than dry.
- Cool with patience, not shortcuts:
- Let cakes rest in their pans for 10 minutes (this prevents them from crumbling), then turn them out onto wire racks to cool completely. Warm cake crumbles under frosting; cool cake holds its shape.
- Beat buttercream until it's silky:
- Cream the butter until smooth, gradually add sifted powdered sugar, then milk and vanilla, and beat until fluffy—about three to five minutes of beating. This creates a spreadable, cloud-like frosting.
- Divide and color your galaxy:
- Split buttercream into four or five bowls and add gel coloring drop by drop until you reach a deep, jewel-toned shade. Gel coloring is potent, so less is more.
- Roll your magic buttercream log:
- Spoon random dollops of each color onto plastic wrap, then roll it into a log shape and snip one end. This creates the marbled effect that looks like you spent hours planning the color placement.
- Pipe into a piping bag and layer your cake:
- Transfer the log to a piping bag fitted with a large round tip. Place your first cake layer on your serving plate, spread a thin layer of galaxy buttercream, and repeat with the next layers.
- Crumb coat first, then chill:
- Apply a thin layer of buttercream all over the cake to seal in crumbs, then chill for 20 minutes. This prevents crumbs from disrupting your final galaxy design.
- Pipe and swirl your galaxy:
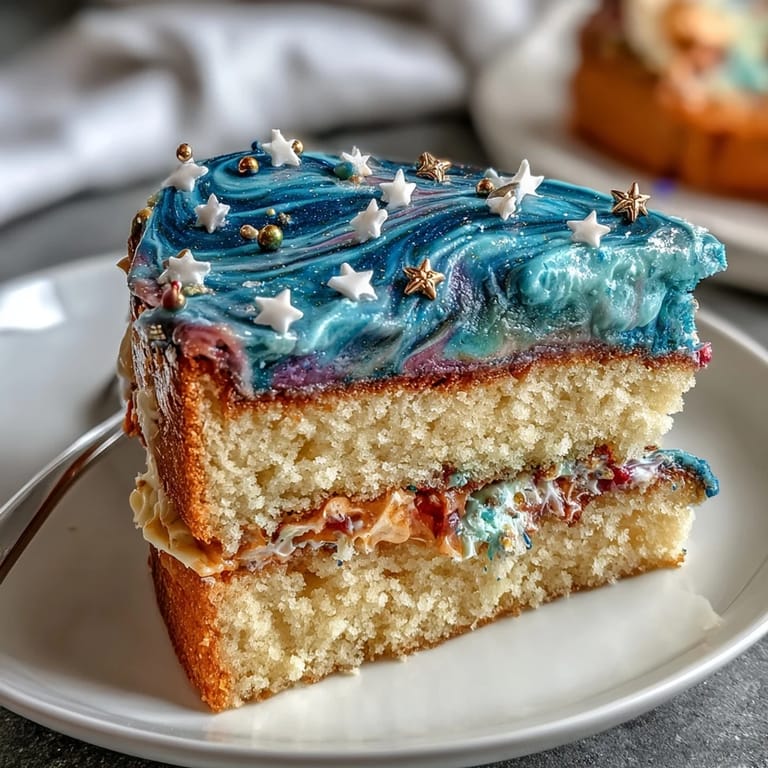
- Generously pipe the buttercream over the cake and gently swirl with an offset spatula to create a marbled, nebula-like effect. The plastic wrap technique means the colors are already mixed beautifully, so you're just spreading, not blending.
- Flick on stars with a paintbrush:
- Dilute white gel coloring slightly with water and use a food-safe paintbrush or splatter tool to flick stars across the cake surface. This adds dimension and that hand-painted feel.
- Finish with edible glitter and sprinkles:
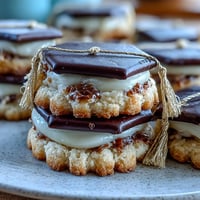
- Sprinkle edible gold and silver stars across the cake, then dust with edible glitter or luster dust for shimmer. A graduation cap topper crowns the whole creation.
When my cousin saw the finished cake sitting on the dessert table at her graduation party, she actually teared up. Her friends were taking pictures before anyone cut into it, and someone said it was too beautiful to eat. But we did eat it, and the vanilla cake with that silky, swirled buttercream tasted even better than it looked—proof that show-stopping desserts don't have to sacrifice flavor for fashion.
Why Room Temperature Ingredients Matter More Than You Think
Cold eggs and milk don't emulsify properly with butter and sugar; they create a broken, grainy batter that bakes up dense and dry. I learned this the hard way on my first attempt at a layer cake years ago—I grabbed eggs straight from the fridge and ended up with a cake that tasted like rubber. Now I set everything out 30 minutes before mixing, and the difference is dramatic. Your batter will be smooth, your cake will be tender, and your frosting will be cloud-like instead of gritty.
The Secret Sauce: Gel Food Coloring
Liquid food coloring is the enemy of buttercream—it adds too much liquid and breaks down the emulsion, leaving you with a greasy, thin frosting. Gel coloring is concentrated, vibrant, and doesn't mess with your ratios. A tiny drop of gel coloring goes so much further than teaspoons of liquid, and the colors are jewel-toned and true. Once I switched to gel, my decorated cakes went from looking homemade to looking like they came from a bakery.
Timing, Chill Marks, and the Art of Staying Cool
The 20-minute chill between the crumb coat and final frosting isn't just a suggestion—it's the difference between a polished galaxy and a cake that looks like you struggled through the final layer. A chilled crumb coat is firm enough to hold shape while you pipe the final buttercream, so swirls stay distinct and don't drag against the cake beneath. This is the kind of patience that pays off visibly.
- If your kitchen is warm, add an extra 10 minutes to the chill time to ensure your crumb coat is fully set.
- Keep your piping bag in the refrigerator between piping sessions if buttercream starts to soften or lose definition.
- A warm cake under cold frosting can cause sweating and separation, so genuinely let everything cool to room temperature before assembly.
 Pin to Board
 This cake celebrates the kind of moments worth making something beautiful for—graduations, achievements, transitions. Bake it for someone you believe in, and watch it become more than just dessert.
Recipe Questions & Answers
- → How do I achieve the galaxy buttercream effect?
Divide colored buttercream into several shades and wrap scoops together in plastic wrap before piping to create the marbled galaxy design.
- → What type of food coloring works best for this cake?
Gel food coloring provides vibrant, rich colors that blend smoothly without thinning the buttercream.
- → Can I prepare the cake layers ahead of time?
Yes, bake the layers a day in advance and store them wrapped tightly at room temperature or refrigerated to maintain freshness.
- → How should I apply the edible stars and glitter?
Use a food-safe paintbrush or splatter tool with white gel coloring to flick stars, then gently sprinkle edible star confetti and glitter for a shimmering effect.
- → What can I serve alongside this cake for gatherings?
Pair with sparkling wine, fruity punch, or other light beverages to complement the cake's rich sweetness.